Showing posts with label zippers. Show all posts

Friday, March 8, 2013

Friday Finishes!

This first project has been on my to do list for a LONG time.  We spend a lot of time in the car going to and from the cabin, which means we may or may not be eating food in there.  And I desperately needed a way to contain the trash that accumulates.  Particularly in the back seat, where some little boys sit.  So, I made a slightly smaller version of this grocery bag holder from a few extra charm squares.  The charms were assembled in rows, and then sliced and rearranged before being resewn into a block.

Looking a little lumpy with all those bags stuffed in it.

I used my serger for the final seam, but I don't love it.  At the top around the elastic, it's bulky.  I plan on making another one (or two, or three), and will change that next time.  I'll probably still serge the inside, just stop before the end.

But, it's perfectly useful, and headed for the back seat.  Now the trick is training them on how to use it.

My second finish is a little knitting project that took much longer than it should have.  It got lost in my knitting pile.  The Asheville Hat!


Malabrigo is soft, washes well, has lovely colors, but one of my favorite things about it, is how much I always have left over!  I think I've got enough for mitts or maybe a small cowl.  Love that.

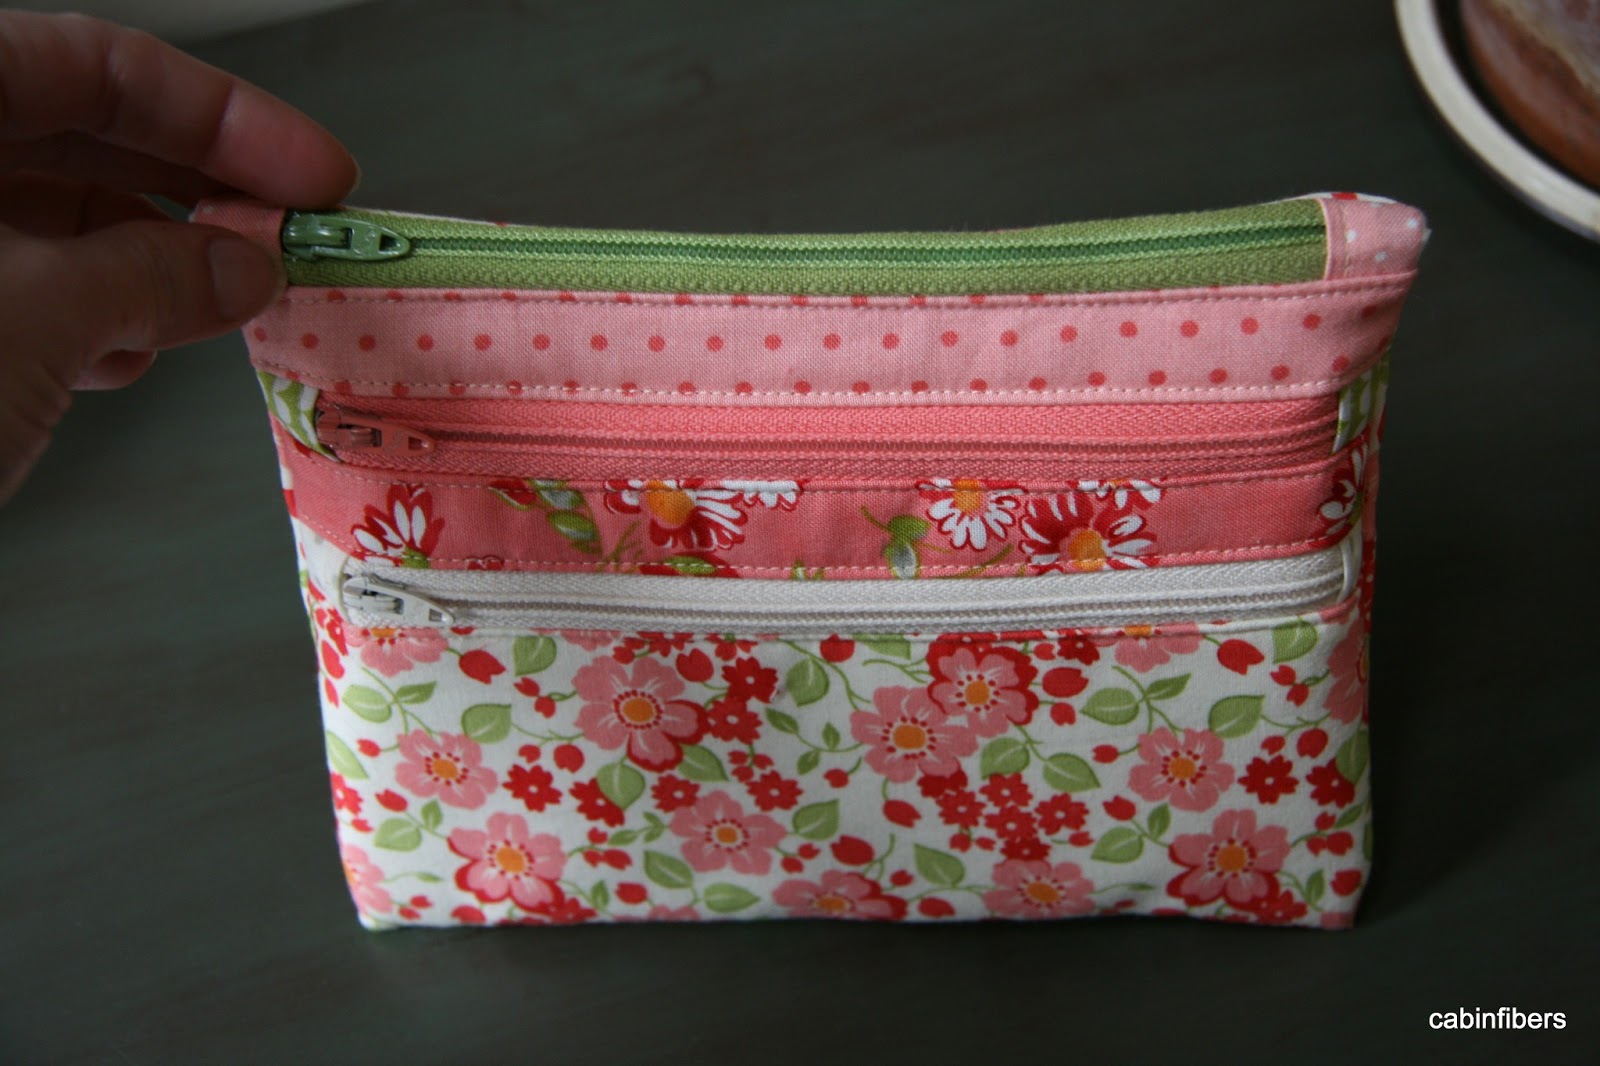
Next up, a little Triple Zip pouch for my Nana's birthday (shhh...I just mailed it.)  I used an alternate method for the last seam, since I had some trouble last time.  It's similar to my regular pouch making method, and went a bit more smoothly.


And finally; impulse-buy fabric, a couple zippers, and three boys out ice skating; equals a perfect storm for some new couch pillows!


The stripe was a result of me being cheap and only buying *just* enough for two pillows.  I had to center the medallions, and ended up a bit short on doing solid fronts and backs.

I also tried a new zipper method.  I basted the opening, applied the zipper to the back, and then removed the basting.  I liked it, but on the bottom of a pillow like this, where it naturally folds open, a small flap may have been neater.


No doubt they'll need replacing before too long, anyway!  Pillows don't spend much time on the sofa here.

That's it for this week.  Happy Friday!

Linking up to finish it up Friday @ crazymomquilts


Wednesday, February 13, 2013

"I asked her for Adidas and she bought me Zips!"

I remember taping that song (yes, onto cassette tapes) off the radio.  Now I have become *that* parent.  And I am confident my children will never understand why I need a bin full of zippers.

I can't pass by a bag of them at the thrift store without snatching them up.  The problem is not that I have too many, but that I can no longer close the bin.  Maybe the bin is the problem.

One day, when I'm dead and gone, my children will donate my bin to the thrift store.  Full circle.
Problem bin

Anyway, when I saw this project on A Quilters Table, it called to me.  Three zippers!  So clever!

My Three Zip Pouch

I had a little bit of trouble with the last step.  It looks great from the outside, but just under the top corners, it got a little sloppy with the fold and sew method.  It closes, just not as neatly as I'd like.  Next time I'll cut the largest lining into two pieces (13"/2 = 6.5" x 8), and sew it together at the end, like I do for regular pouches.

The tutorial was super easy to follow, and well written.  The last step thing was probably just me.  The most time consuming bit was changing my 1/4" foot to my edge stitching foot after each step.  Well, that and picking out zippers and fabric.

Will be making another for sure.